D365 Scheduling : msdyn_SearchResourceAvailability – C# Working Code

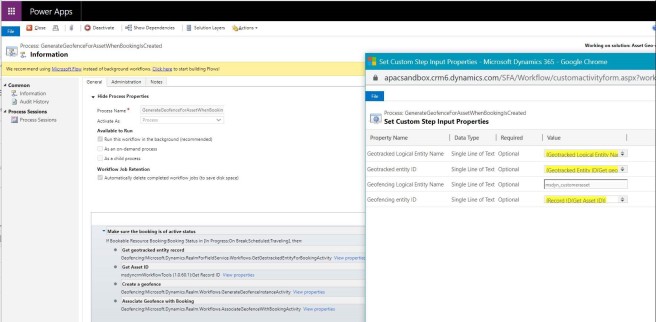
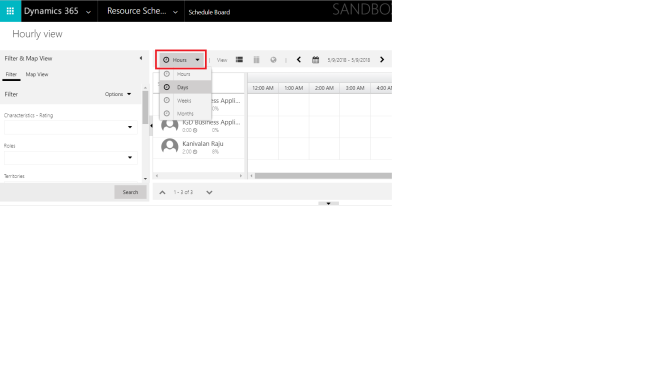
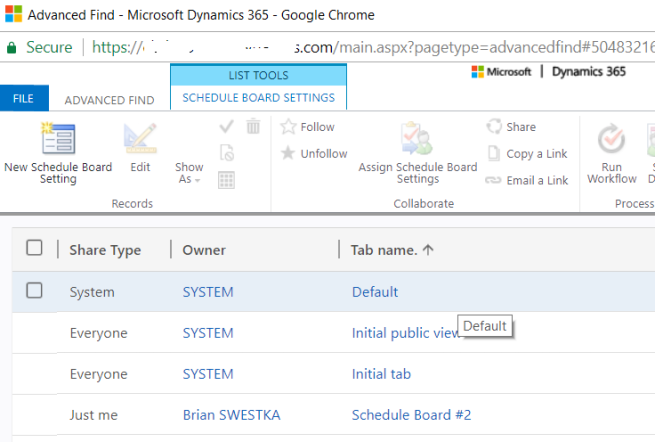
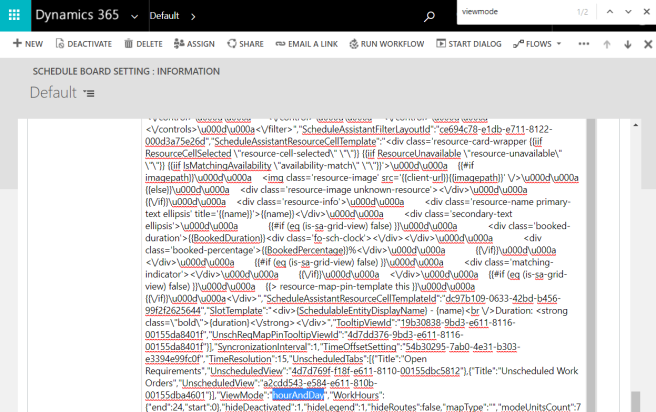
Currently, we use Schedule Board/Assistant to find the availability of resources based on the requirement.

msdyn_SearchResourceAvailability SDK message has been recently released to build custom functionality around the resource availability finding.

Here’s the C# Working Code snippet:

Entity settings = new Entity(“organization”);
settings[“UseRealTimeResourceLocation”] = false;
settings[“ConsiderTravelTime”] = true;
settings[“ConsiderSlotsWithOverlappingBooking”] = false;
settings[“ConsiderSlotsWithLessThanRequiredDuration”] = false;
settings[“ConsiderSlotsWithProposedBookings”] = false;

var entityCollectionResourceType = new EntityCollection();
entityCollectionResourceType.Entities.Add(new Entity
{
Id = new Guid(),
LogicalName = “ResourceTypes”,
Attributes =
new AttributeCollection
{
new KeyValuePair(“value”, 8)
}
});

var entityCollectionTerritories = new EntityCollection();
entityCollectionTerritories.Entities.Add(new Entity
{
Id = new Guid(),
LogicalName = “territory”,
Attributes =
new AttributeCollection
{
new KeyValuePair(“territoryid”, workOrderDetails.TerritotyId)
}
});
var constraints = new Entity() { LogicalName = “organization”, Id = new Guid(),
Attributes = new AttributeCollection
{
new KeyValuePair(“Territories”, entityCollectionTerritories)
}
}; //Territories

Entity resourceSpecification = new Entity(“organization”);
resourceSpecification[“ResourceTypes”] = entityCollectionResourceType;
resourceSpecification[“RetrieveResourcesQueryId”] = new Guid(fpsActionRetrieveResourcesQueryId);// “e014219f-65c7-476c-88e0-da0e21d4048a”);
resourceSpecification[“Constraints”] = constraints;

var response = service.Execute(
new OrganizationRequest(“msdyn_SearchResourceAvailability”)//””msdyn_getresourceavailability”)
{
Parameters = {
{ “Version”, “1.0” },
{ “Requirement”, requirement},
{ “Settings”, settings},
{“ResourceSpecification”, resourceSpecification}
}
});
var timeSlots = (EntityCollection)response.Results[“TimeSlots”];

Dynamics 365 CI/CD : Turn ON Power Automate (MS Flow) using PowerShell after Solution Import

Often, Power Automate (MS Flow) components goes into OFF mode, post solution import. Had to manually turn it on in this case, as post deployment step.

Especially, if you automated solution deployment setup (CD) in Azure DevOps using Pipelines, this PowerShell script would save your time.

Just a create a Powershell task and put it after solution import step.

$Username=’$(Username)’
$Passwrod=’$(Passwrod)’
$EnvironmentName=’$(EnvironmentName)’

try
{
$modulePowerAppAdministrator=’Microsoft.PowerApps.Administration.PowerShell’
$modulePowerAppAdministrator=’Microsoft.PowerApps.PowerShell’

if(!(Get-Module -ListAvailable -Name $modulePowerAppAdministrator))
{
Write-Host “Installing PowerAppsModule.”
[Net.ServicePointManager]::SecurityProtocol = [Net.SecurityProtocolType]::Tls12
Install-PackageProvider -Name NuGet -RequiredVersion 2.8.5.201 -Force
Install-Module -Name Microsoft.PowerApps.Administration.PowerShell -Force -Verbose -Scope CurrentUser
Install-Module -Name Microsoft.PowerApps.PowerShell -AllowClobber -Force -Verbose -Scope CurrentUser
Write-Host “Installed Successfully PowerAppsModule.”
}
else
{
Write-Host “Module already installed”
}

}
catch
{

Write-host $_.Exception.Message
}

try{
Write-Host “Connecting Target Instance of PowerApps.”
$pass = ConvertTo-SecureString $Passwrod -AsPlainText -Force
Add-PowerAppsAccount -Username $Username -Password $pass
Write-Host “Successfully Target Instance connected.”
}
catch
{
Write-host $_.Exception.Message
}

try{
Write-Host “Connecting Environment.”

$en=”*$EnvironmentName*”
$environmentName=Get-PowerAppEnvironment $en | Select -ExpandProperty EnvironmentName
Write-Host “Connected Environment.” $environmentName

Get-FlowEnvironment $environmentName
}
catch
{
Write-host $_.Exception.Message
}

$listOfMsFlow=”;
$listOfMsFlow=Get-AdminFlow -EnvironmentName $environmentName |where-object {!($_.Enabled -eq “True”) } | Select FlowName
$count=1;
foreach ($flow in $listOfMsFlow)
{

try{

Write-Host “Flow Name : ” $flow.FlowName $count

Enable-AdminFlow -EnvironmentName $environmentName -FlowName $flow.FlowName
#Disable-AdminFlow -EnvironmentName $environmentName -FlowName $flow.FlowName
# Write-Host “Turn Off.” $flow
$count=$count+1;
}
catch
{
Write-Host “Failed to Turn On.” $flow.FlowName
Write-host $_.Exception.Message
}

}

PS : On very first deployment of flows into new instance, you probably have to set up the connections.


Cheers

Dynamics 365 Field Service Geo-fencing Asset

Apart from the below MS Doc steps, some additional things to do to implement geo-fencing for Asset entity.

https://docs.microsoft.com/en-us/dynamics365/field-service/geofencing

1. Geo-code Asset entity:

Before we start following the doc, geo-code the asset – update the assets with geo-coordinates (latitude/longitude) and then write a workflow to copy the asset’s geo-coordinates to Work Order on Work Order Creation.

This is because system copies the service account geo-coordinates to work order on its creation.

2. Create Entity Configuration for Asset:

Lets follow the steps in the doc.

When I reached step #7, i deleted the Entity Configuration for Account and create new one for Asset. Under the hood, it creates a lookup to Asset in Geofence entity.

3. Update the step ‘Create a geofence’ in OOB workflow GenerateGeofenceWhenBookingIsCreated 

Geofencing Logical Entity Name = msdyn_customerasset

Geofencing entity ID = GUID of the asset record.

First, create a new lookup field to asset in booking entity and set its value on booking creation from the Work Order’s primary customer asset field.

Secondly, i used Dynamics 365 custom workflow tools, to get asset guid from record.

generategeofencewhenbookingiscreated

4. Geotracked Record Status is empty

Once its all done and i created a booking, a geofence record got created by the system – all good, but Geotracked Record Status is empty. Final Hurdle.

If you too face this issue, read below:

Reason : As per the documentation, Latitude / Longitude in Bookable Resource should have set based on the mobile audit values. In my case, it’s not.

Fix : I built a Power Automate (MS Flow) that fetches the latitude/longitude values from Mobile Audit on its record creation and update the bookable resource latitude/longitude values.

Now, i can see geofence events getting created:-)

One last thing – i noticed Geofence Alerts solution was not installed, due to which the workflows are not available to send mobile push notifications.

Not a problem, you can implement it by your own by following below:

https://docs.microsoft.com/en-us/dynamics365/field-service/mobile-push-notifications


Hope this helps someone

Cheers


Dynamics 365 CE S2S : Automate App Registration in Azure AD using PowerShell

Application user creation in Dynamics 365 CE requires an app registration in Azure AD, which is a lengthy process. You can automate it using PowerShell.

Launch PowerShell as Administrator in your local machine and run this script.

# Install AzureAD PS module in local m/c
Install-Module AzureAD

#Connect to Azure AD – Launches popup to enter username/password
Connect-AzureAD

#Get CDS object (shown as Dynamics CRM in Azure Portal)
$AzureMgmtPrincipal = Get-AzureADServicePrincipal -All $true | Where-Object {$_.DisplayName -eq "Common Data Service"}

#Create API permission to CDS
$AzureMgmtAccess = New-Object -TypeName "Microsoft.Open.AzureAD.Model.RequiredResourceAccess"
$AzureMgmtAccess.ResourceAppId = $AzureMgmtPrincipal.AppId
$AzureSvcMgmt = New-Object -TypeName "microsoft.open.azuread.model.resourceAccess" -ArgumentList $AzureMgmtPrincipal.Oauth2Permissions.Id, "Scope"
$AzureMgmtAccess.ResourceAccess = $AzureSvcMgmt

#Create App Registration – Update DisplayName value as needed
$App = New-AzureADApplication -DisplayName "Integration App2" -RequiredResourceAccess @($AzureMgmtAccess)

#Create App Secret
$AppSecret = New-AzureADApplicationPasswordCredential -ObjectId $App.ObjectId -CustomKeyIdentifier "Access Key" -EndDate (get-date).AddYears(1)

#Create managed application in local directory
$AppSPN = New-AzureADServicePrincipal -AppId $App.AppId -Tags @("WindowsAzureActiveDirectoryIntegratedApp")

Once the script runs successfully, you can fetch the Client ID and Secret from the script variables $App.AppId and $AppSecret respectively.


Hope this saves your time!!

Cheers


Dynamics 365 Schedule board : Change default view mode

Recently, I had a requirement from customer to change the default schedule board view mode from Hours to Days.

sb3.png

Here are the steps to achieve it.

  1. Open ‘Schedule Board Setting’ preferably from Advance Findsb1
  2. Open the record named ‘Default’ and scroll down to ‘Settings’ field which contains JSON values under Others tab.
  3. Locate “ViewMode” and replace “hourAndDay” with “dayAndWeek” sb2

Dynamics CRM : Find entity name from object type code

Hey folks, Just found a quick way to find the name of the entity from its object type code by querying entitydefinitions through Dynamics 365 Web API.

Need for it comes when system throws insufficient privileges error with object type code.

<Message>SecLib::AccessCheckEx failed. Returned hr = -2147187962, 
ObjectID: 1dedbae1-2568-e511-80c3-000c298a923d, 
OwnerId: 00000000-0000-0000-0000-000000000000, 
OwnerIdType: 8 and CallingUser: abac721d-856a-e511-80c3-000c298a923d. 
ObjectTypeCode: 8, 
objectBusinessUnitId: a202a668-3be7-e511-80c7-000c298a923d, 
AccessRights: AppendToAccess </Message>

Here, difficulty comes only when the entity we are trying to find is custom entity or the entities from add-on solutions like Field Service, Portal etc. Otherwise, it can be find easily by google search.

Below the API query which you can run directly from browser. Make sure you logged into the CRM instance and try this in new tab.

https://demo.crm.dynamics.com/api/data/v8.2/EntityDefinitions?$select=DisplayName&$filter=ObjectTypeCode eq 10097

Here we go:

objecttypecode

Thanks for reading!!

Debug any third party library(.Net DLL) without source code

Debug/Step into any .Net DLL (including third party libraries) to see its internals with ease using JetBrains dotPeek – a Free .Net Decompiler


Introduction

Have ever imagined about stepping into(F11) the third party libraries to check out how that works? That is absolutely possible. Continue reading!!

Pre-requisite

JetBrains dotPeek – a free .Net decompiler. Just download and install it.

Steps

I will walkthrough with steps to debug/step into a method JsonConvert.SerializeOject() in the famous third part library – Newtonsoft.Json from a console application.

1. Create a console application in VS and then install ‘Newtonsoft.Json’ library either from Nuget or from local system if already exists.

2. Copy paste below code in the Console app. Refer ‘Newtonsoft.Json’ library at using section.

    public class Employee
    {
        public string Name { get; set; }
        public int Id { get; set; }
        public string Location { get; set; }
    }
    class Program
    {
        private static void Main(string[] args)
        {
            var emp =new Employee() { Id = 1,Location = "Blr",Name = "Kani"};
            var serialized = JsonConvert.SerializeObject(emp);
            Console.ReadLine();
        }
    }

2. Now open dotPeek. Click on File->Open to locate the library ‘Newtonsoft.Json’ and open it. If installed through Nuget, then it can be found uder packages folder in your console app solution folder.

3. Once loaded in the Assembly explorer, right click the library and click on ‘Generate Pdb’.

3. Specify a folder to save the PDB file generated for the library. PDB file contains the symbols for the dll which is used by VS Debugger to debug code in the dll. In this case, select only Newtonsoft.Json as we are not stepping into its dependent assemblies.

4. All set now. Lets set a breakpoint on line JsonConvert.SerializeOject() and press F5. Pressing F11 at the breakpoint hit wont do anything at this point of time. Stop the debugger. We need to do one final critical step.

5. Copy the pdb file saved earlier from the folder mentioned in dotPeek and paste it over under bin/debug folder in your project solution folder.

6. Now, You should be able to step into the method.

Happy debugging!! Play around it and do share your thoughts.